Sunday 21 December 2008

Mini Sausage and Cheese Bun

Buns are fairly common in Asian countries, people tend to have them for breakfast or high tea. The buns sold in most of the bakeries are in quite a large size. However, if you have kids or if you are having some sort of a party, you can bake your buns in mini sizes for easy servings.

Do try out this recipe during your free time. The total time consumed to make this recipe may take up to 3 or 4 hours, so you might want to sort out your free time before starting.


Ingredients:


Dough


800g Bread Flour


15g Yeast


190g Caster Sugar


1Tsp Baking Powder


6g Bread Improver


50g Butter


350g Cold Water


2Tsp Milk Powder (Optional)


1Tsp Honey


Filling


Cooked Sausage (Cut into 2 inches)


Cheddar Cheese (Cut into cuboid of 1cm x 1cm x 4cm)


Glazing


1 Egg (beaten)


Method:


  1. Put bread flour, yeast, sugar, baking powder, bread improver in a mixing bowl and mix well. Add in milk powder and honey.


  2. Slowly pour in water.


  3. Use slow speed to knead the dough till gluten is formed (can pull into very thin sheet without tearing).


  4. Add in butter and knead till well-combined.


  5. Leave aside and cover with a wet cloth to prove till double in bulk.


  6. Divide into 64 equal portions.


  7. Shape each portion into a roll about 10cm long.


  8. Take one sausage or cheese and use the dough to roll around it. Another alternative is to roll each portion into thin oval shape and place a sausage or cheese near one end and roll it up.


  9. Arrange sausage rolls on a greased baking tray 5 cm apart to prevent sticking.


  10. Brush buns with beaten egg, cover with a wet cloth and leave to prove till double in bulk. This takes around 1 hour.


  11. Bake in a pre-heated oven at 200 degree Celcius till golden brown, for about 15-20minutes. Remove and leave to cool.


Tips:
  • Do not overbake bun, it will be dry and hard.
  • Number of buns may vary according to own preference. This depends on the size of the buns made.

  • The bun sizes shown in the pictures above are around 8 cm and there are two ways to do this: (i) you can weigh the whole dough and divide the weight by 64 (this is the estmated amount of buns the ingredients above can be made into), or (ii) knead the whole dough into a spherical shape and cut into half with a dough cutter. Each half of the dough can then be cut into two more halves. This can be continuously done for six times to get the right size for a bun.
  • Make sure fillings are not wrapped too tight.


-=Happee Cooking=-

Thursday 18 December 2008

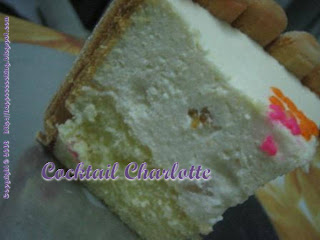
Cocktail Charlotte

Here's another charlotte that I've made recently for my friend's birthday. Basically, it's same with the mango charlotte I've made previously except the filling is replaced with cocktail. There's some changes for the recipe,

  1. Replace 120g of mango with 120g of fruit cocktail.
  2. Replace pureed mango with cocktail syrup.
Here's some pictures that I've took......=D


-=Happee Cooking=-

Wednesday 17 December 2008

Ham and Potato Bake

Layers of potato, ham and cheese are bound together by a quiche-like egg and cream mixture. This potato bake cuts well and can be served hot or cold, as a side dish or with a salad as a light meal.


Ingredients:
2 Medium-sized potatoes (around 100g each)
3 Slices of cheddar cheese
2 Slices of ham, finely chopped or cut into small square pieces
1/2 Medium onion, diced
2 Large eggs
6 Tbs of cream (Nestle)
Salt and pepper


Preheat oven to 180 degree Celsius (160 degree Celsius for fan forced oven)

Thoroughly grease a 10cm diameter pan or bowl. You could use a springform pan for neat and easy serving, but make sure it is leadproof.


Methods:

Peel and halve potatoes. Boil potatoes until tender, drain. Allow potatoes to cool then cut into 1cm thick slices.

Cover the base of the prepared bowl with a layer of potato slices. Season with salt and pepper.


Top with half of the onion and a layer of ham. Place slices of cheese on top of the ham.


Repeat the layering ingredients (seasoning each layer of potatoes), finishing with a layer of cheese.

Use a whisk or fork to beat the eggs and cream until well combined. Gently pour the mixture over the ingredients in the bowl.


Bake for about 50-60 minutes, until the top is golden brown and the egg mixture has set. Cover the bake with aluminium foil if the top begins to brown before the egg mixture has set.


Remove from oven and set aside for 10 minutes before removing from pan. Cut into wedges to serve.

This recipe serves about 2-3 persons.
-=Happee Cooking=-


Tuesday 21 October 2008

Biscuit Pudding

This is a pudding made of 3 layers of milk-dipped marie biscuits of two different flavours in the mixutre of cream and condensed milk. The first time i get to know about this dessert is when my friend bought it for me from a shop in my university as she found it very delicious. I tried to find out what the ingredients for making this dessert and I got it with just one failure. I also realized that you could alter the layering steps as well. This dessert is suitable for occasions, such as potluck, birthday party, as it is easy to make.


Ingredients:
30 pieces Marie Biscuits (Original Flavour)
15 pieces Marie Biscuits (Coffee Flavour)
300ml Nestle Cream
9 Tbs Sweetened Condensed Milk
250ml Full Cream Milk
Canned Fruits for Garnishing (Eg. Mixed Cocktail, Peach, Longan)

[Makes about 15 cups)

Method:
  1. Mix Nestle cream with condensed milk. Beat for 3-4min at medium speed.
  2. Pour a small amount of cream mixture into the cups. Make sure it covers the entire base of the cup.
  3. Dip biscuit (original flavour) in the milk for 5 secs and place in on the cream mixture in the cup.
  4. Repeat step 3 but with alternate flavours i.e. one coffee flavoured biscuit between two original flavoured biscuits.
  5. Pour cream mixture into cups until it covers all the biscuits.
  6. Place fruits on top and refrigerate for 4 hours before serving.


.

Red Bean Paste

Making the bean paste may be a little time consuming as it takes up 1 and a half hour. Ensure that you don't have other important things to do when you're making the paste as it needs checking out occasionally. Red beans get burnt easily, that's why you need to check it out constantly. This is also the reason why I didn't get the chance to take down any pictures as this is my first time making the red bean paste.


Ingredients:
180g Red Beans
180g Sugar
Pinch of salt
[Makes about 450g]

  1. Soak beans for 1 hour. Strain, then place beans in a pot covered with an inch of water.
  2. Bring to boil over high heat, drain and discard the water.
  3. Add about 3 cups of water to a pot containing the par-boiled beans.
  4. Bring to boil over high heat. Reduce heat to medium and cover the pot.
  5. Simmer the beans until soft. Add a small amount of water when the water is absorbed by the red beans to prevent scorching.
  6. Check out the beans occasionally while simmering as the red beans could easily get burnt.
  7. The simmering process would take about 45min to 1hr and 15min to be done.
  8. Once it is almost done, all the water should be absorbed completely by the beans. Add sugar and stirring gently until the bean paste is heated through and glossy.
  9. Season with a pinch of salt and mix well. The paste should be thick with some whole and half-crushed beans.

Green Tea and Red Bean Cheesecake

This is the cake that I've been looking forward to make for my friend's (who is a green tea lover) brithday since last year. If you are green tea lover, then you'll definitely love this cake. It is a biscuit-based cake with green tea light cheese filling on top of reb bean cheese filling, surrounding a sponge cake.
Biscuit Base


Ingredients:
11 pieces (around 180g) Digestive Biscuits
75g Butter

Method:

  1. Crush biscuits in a plastic bag.
  2. Allow butter to soften to room temperature and mix with crushed biscuit.
  3. Spread and press the biscuit mixture over the base of a 9” cake tin. Put it in the freezer for about 1hour.

Sponge Layer

Ingredients:
75g Cake flour
1tsp Baking powder
1/2tsp Corn Flour
3 Eggs (separate)
30g Cold Water
1-1/2oz Corn oil
2oz Caster Sugar
1/2oz Caster sugar (for egg whites)


Method:
  1. Sift cake flour, corn flour and baking powder together for at least 3 times.
  2. Mix corn oil, sugar, egg yolks and cold water. Then fold in the flour mixture. Use a whisk to stir it until well- mixed.
  3. Use high speed to beat the egg whites then slowly add in 1oz of sugar until stiff.
  4. Mix the egg whites with the mixture in (2) until well-combined using a wooden spoon.
  5. Pour batter into a 9” baking tin and bake at 165 degree C for 45mins.

Red Bean Cheese Filling


Ingredients:
150g Cream Cheese
60-70g Caster Sugar (depend on the sweetness of red bean paste)
40ml Milk
250g Red Bean Paste (Refer to Note)
250g Light Cream Cheese
8g Gelatin
70ml Hot Water
3 tbs Nestle Cream

Note: For the red bean paste, you could either cook it yourself or use the canned type. I recommend cooking on your own as you can choose the sweetness of it. Moreover, the canned red bean paste is normally very sweet. Click here for the recipe of red bean paste.

Method:

  1. Beat cream cheese and sugar till thick. Scrap the side of the bowl clean and add mixture into the milk in two batches.
  2. Beat light cream cheese. Add gelatin into water and dissolve gelatin.
  3. Fold light cream cheese into cream cheese mixture and mix well. Then add in red bean paste and mix well.
  4. Add in gelatin when it is warm.
  5. Pour some of the filling onto the biscuit base and lightly place the sponge cake on top.
  6. Pour the remaining filling and smoothen the top and refrigerate for 1 hour.

Green Tea Filling:

Ingredients:
250g Light Cream Cheese
100g Sugar
4 tsp Green Tea Powder
70g Hot Water
7g Gelatin
8g White Wine
3 tbs Nestle Cream

Method:

  1. Dissolve gelatin in water. [Always add gelatin to hot water]
  2. Dissolve green tea powder in a small amount of warm water [Just enough to dissolve the green tea powder]
  3. Beat light cream cheese with sugar, add in white wine and gelatin mixture. Mix well.
  4. Pour in the green tea filling onto the red bean cheese filling and smoothen the top. Refrigerate until harden.


For the wordings on top, I used green tea powder. While for the decoration, I used a ribbon wrapping around the side and white chocolate chips pressed into the green tea layer on top.


Sunday 12 October 2008

Sacher Torte


Sacher Torte is a chocolate cake which is invented by Franz Sacher in 1832 in Vienna, Austria. It is one of the most famous Viennese culinary specialties. This cake basically consists of two layers of dense, not overly sweet chocolate cake with a thin layer of apricot jam in the middle and dark chocolate icing with shreds of chocolate on the top and sides. It is traditionally served with whipped cream without any sugar in it, as most Viennese consider the Sacher Torte is too "dry" to be eaten on its own.

I've made this torte last week for my sister's birthday dinner. Unfortunately, the chococate icing on the top and sides turned up to be too sweet. The recipe i've found uses all-purpose flour but the result of the torte is not very spongy, so you could try using cake flour instead.


Ingredients:

6 Egg(separated)
5 oz Semisweet or bittersweet chocolate, chopped
1/2 cup Butter
1-1/2 tsp Vanilla
1/2 cup Sugar
3/4 cup Cake Flour or All-purpose flour
4 Tbs Apricot jam


For Chocolate Icing:
5 oz Chocolate
4 oz. Granulated sugar
1/4 cup Water
1/4 tsp Butter(melted)


Note: I've used the mixture of dark chocolate, semi-sweet chocolate and milk chocolate, as I don't really like the bitterness of dark chocolate. You could choose the type of chocolate according to your own preferences. If you prefer milk chocolate, don't forget to reduce the amount of sugar.


Method:
  1. Let egg whites stand at room temperature in a very large bowl for 30 minutes.


  2. Grease and lightly flour a 9-inch springform pan. Set aside.


  3. Melt chocolate and butter in a medium saucepan over low heat; cool. Stir egg yolks and vanilla into the cooled chocolate mixture. Set mixture aside.


  4. Beat egg whites with an electric mixer on medium to high speed until soft peaks form (tips curl). Gradually add sugar, about 1 tablespoon at a time, beating about 4 minutes or until stiff peaks form (tips stand straight).


  5. Fold about 1 cup of the egg white mixture into chocolate mixture. Fold chocolate mixture into remaining egg white mixture. Sift about one-third of the flour over the egg mixture; gently fold in. (If the bowl is too full, transfer mixture to a larger bowl.) Repeat twice, sifting and folding in one-third of the flour at a time.


  6. Spread batter into the prepared pan. Bake in a 175 degree C oven for 30 to 35 minutes or until a wooden toothpick inserted near the center comes out clean. Completely cool cake in the pan on a wire rack. Remove sides of pan. Brush crumbs from edges of cake. Remove bottom of pan from cake.


  7. To assemble, cut cake horizontally into two even layers. Place the bottom layer on a large serving plate. Spread the apricot jam on top of the cake layer on plate. Top with the second cake layer.


  8. For chocolate icing, in a saucepan dissolve granulated sugar in water and then bring to boil.


  9. Brush the sides of the saucepan with a brush dipped in cold water to prevent crystals forming.


  10. Cook till the sugar mixture becomes thick or syrup form, than remove from fire and leave to cool.


  11. Melt chocolate until soft but not hot. Add lukewarm sugar into melted chocolate, than add melted butter into chocolate icing and stir well.


  12. Spread chocolate icing on the cake.

Friday 10 October 2008

Tiramisu

Tiramisu is one of the most popular Italian desserts. It is made of sponge fingers dipped in coffee and mascarpone cream. In the original recipe, there was no liquor as the cake was originally aimed at children and the elderly and the original shape was round. The name Tiramisu is Italian and means “pull-me-up”, a reference to the effects of the sugar and espresso, but can be translated figuratively as “cheer me up”. Nowadays, when you try to look for the recipe of tiramisu, you would find that there are many recipes that are slightly different with the ingredients but method of making it is similar.

While I was searching through the sites for tiramisu’s recipe, I saw many pictures of tiramisu which made me want to try out making one as well. Finally, I found a recipe which needs 6 egg yolks and there was 6 pieces of egg yolk left from the Mango Charlotte that I made recently. Thus, I decided to try out that recipe. For your information, most of the recipes use 6 eggs, using it separately, instead of just egg yolks.


Ingredients:
6 Egg yolks
5 tbs Caster sugar
2 tbs Caster sugar (for coffee or espresso)
1 pound Mascarpone cheese ( I used 2 packet of 8oz Philadelphia cream cheese)
1tbs Nestle cream
1½ cups Strong coffee or espresso, cooled
3 tsp Rum
24 Packaged sponge fingers
½ cup Cocoa powder for garnishing


Method:

  1. In a large bowl, using an electric mixer with whisk attachment, beat egg yolks and sugar until thick and pale for about 5 minutes.
  2. Add cream cheese and nestle cream and beat until smooth. Add 1 tsp of espresso and mix until thoroughly combined.
  3. Add sugar while the coffee is still hot. When cooled, add the rum and stir evenly. Pour the coffee mixture to a small shallow dish.
  4. Place each sponge finger into the coffee mixture and turn the finger 2 times. [Letting the sponge fingers soak too long will cause them to fall apart].
  5. Place the soaked sponge fingers on the bottom of a long rectangular container or baking dish, breaking in half if necessary in order to fit the bottom.
  6. Spread evenly ½ of the cheese mixture over the sponge fingers.
  7. Arrange another layer of soaked sponge fingers and top with remaining cheese mixture.
  8. Cover the tiramisu with plastic wrap and refrigerate for at least 2 hours. For best result, refrigerate up to 8 hours.
  9. Before serving, sprinkle with cocoa powder.

I sprinkled a little of coffee powder for garnishing. While for the cocoa powder, I replaced it with Milo powder instead.

The side and inner view of the tiramisu.


-= Happee Cooking=-